Overview UI & Screens
Login
The base URL of the MC Web Designer is https://[YOURDOMAIN]/MC/admin.
There you can see a login window. If you forgot your password you can write your admin.

Main View
If the Login was successful, you can see up to three sections (depends on your role).
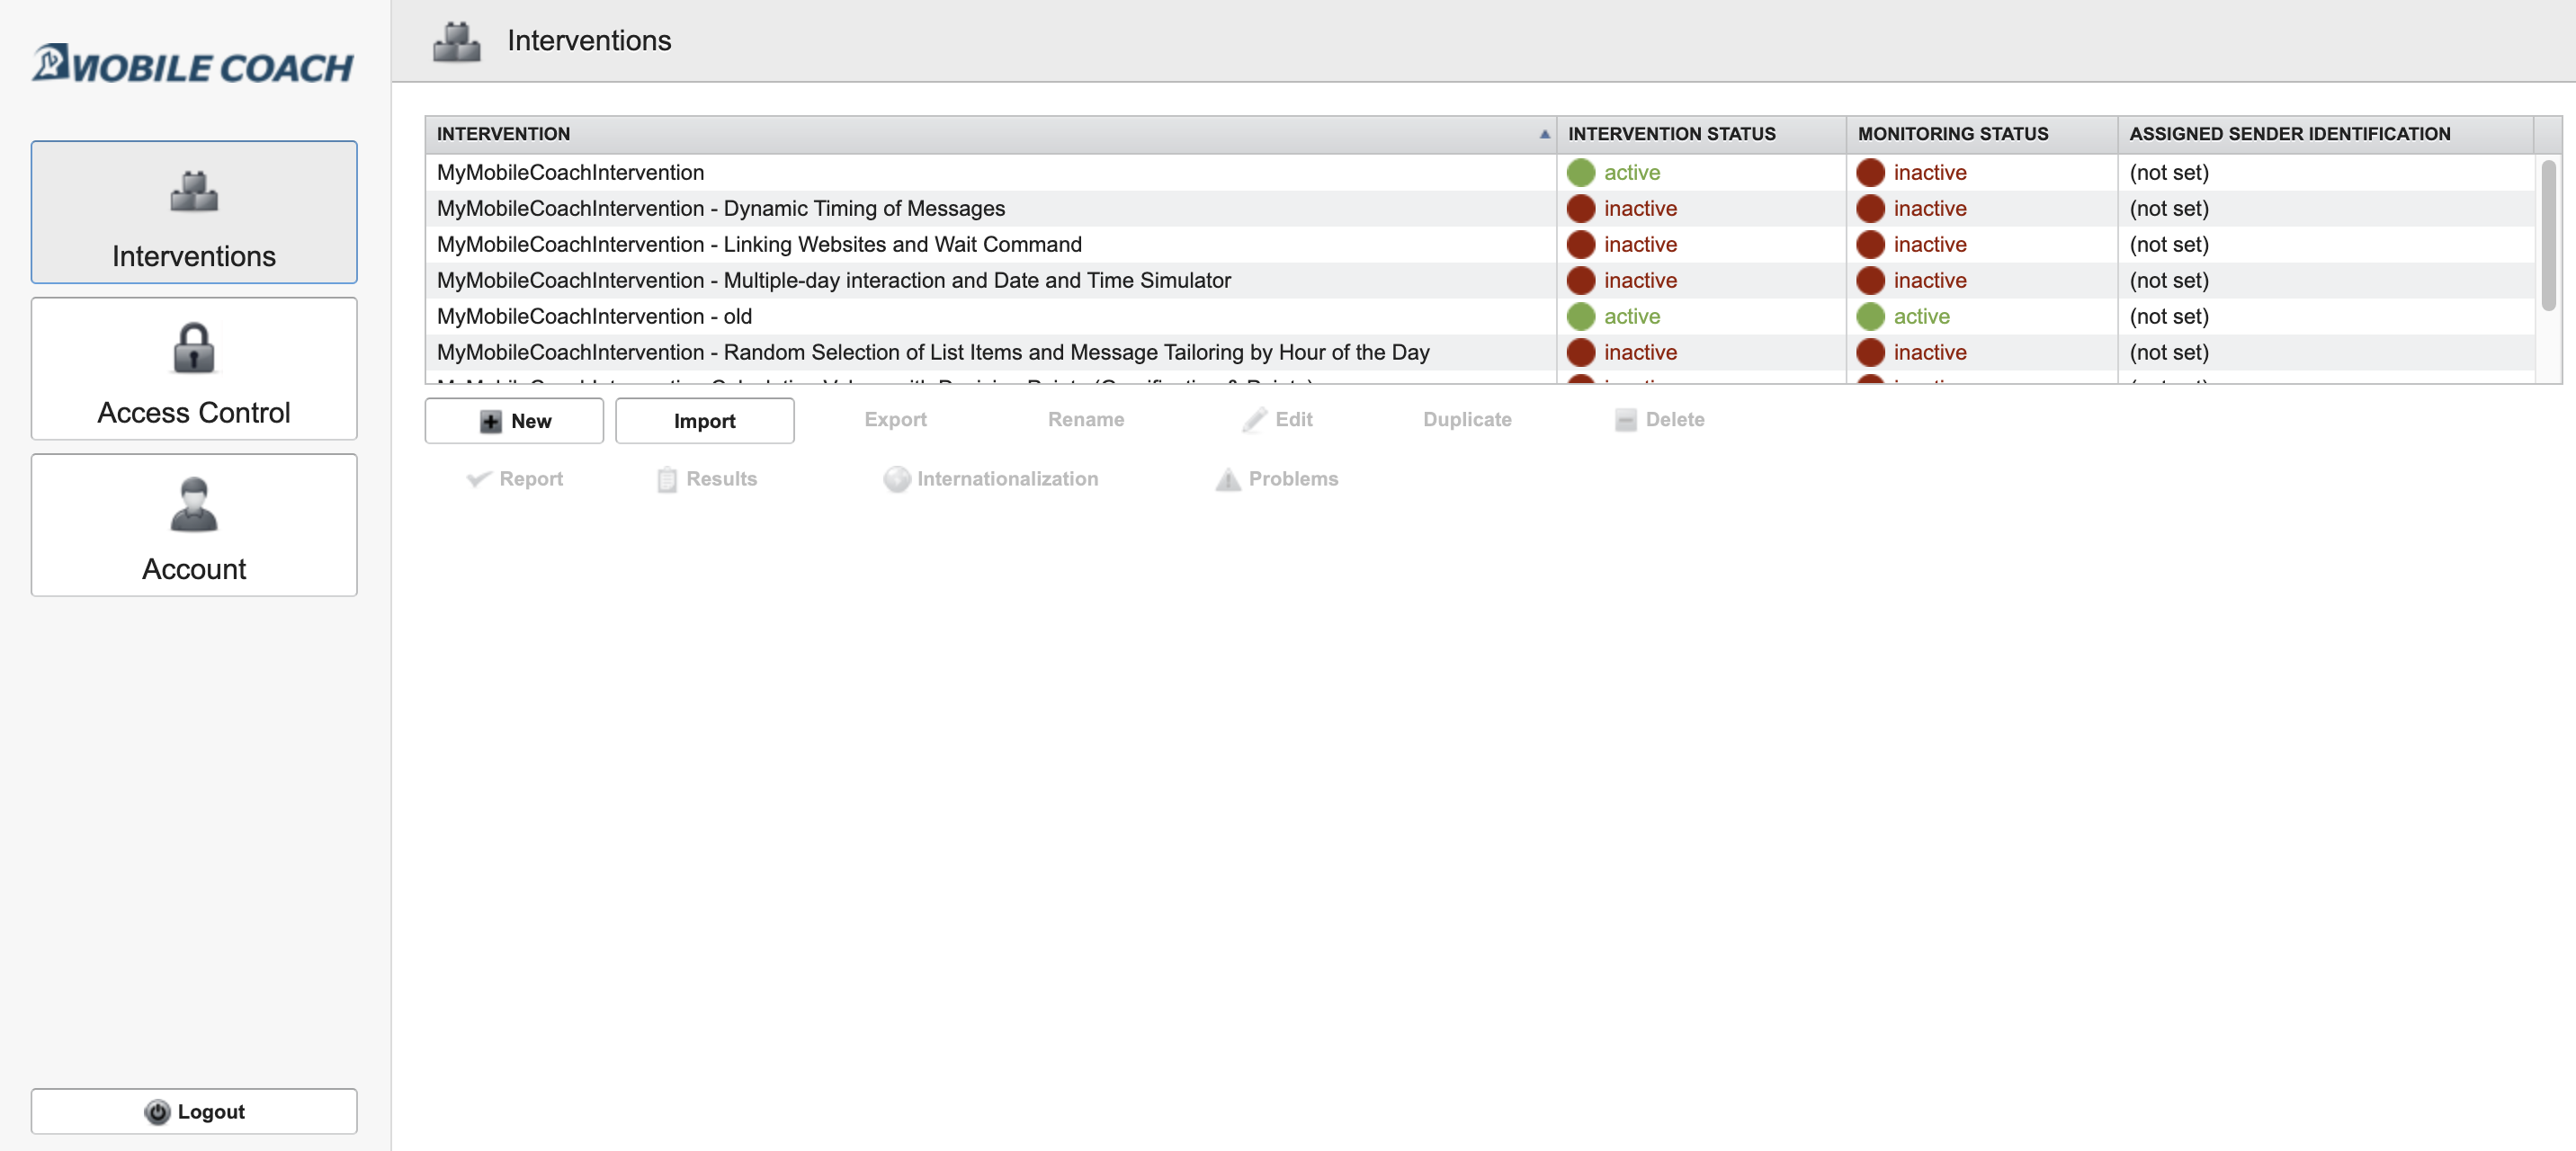
Interventions --> Overview of all interventions. Here is where the magic happens.
Access Control --> If you’re an admin, you can add new accounts and define roles. See Access Control
Account --> You can change your password here. If you’re admin you can also unlock interventions.
Intervention List View
In the 'Intervention List View' you can see all interventions you have access to and their status.

| Action Button | Explanation |
|---|---|
| New | Create a new intervention. |
| Import | Import an “.mc” file |
| Export | Export the intervention as an “.mc” file. If you want to export/import it on another server, be aware that the MC Web Designer needs to be the same version. Otherwise there could be conflicts. |
| Rename | Rename an intervention |
| Edit | Edit the intervention |
| Duplicate | Duplicate an intervention. Everything is copied unless all participants/results. Can be used for a version history. |
| Delete | Deletion of an Intervention. Please make backups, that if you accidentally delete an intervention, you can restore it. |
| Report | Download of an HTML file, where you can view the Settings, Surveys, Rules, Message Groups and Messages and Micro Dialogs. Could give a nice overview, but needs to be updated. |
| Results | Showing the results/information about all participants of the intervention. (See Exporting Data) |
| Internationalization | todo |
| Problems | todo |
Locked intervention
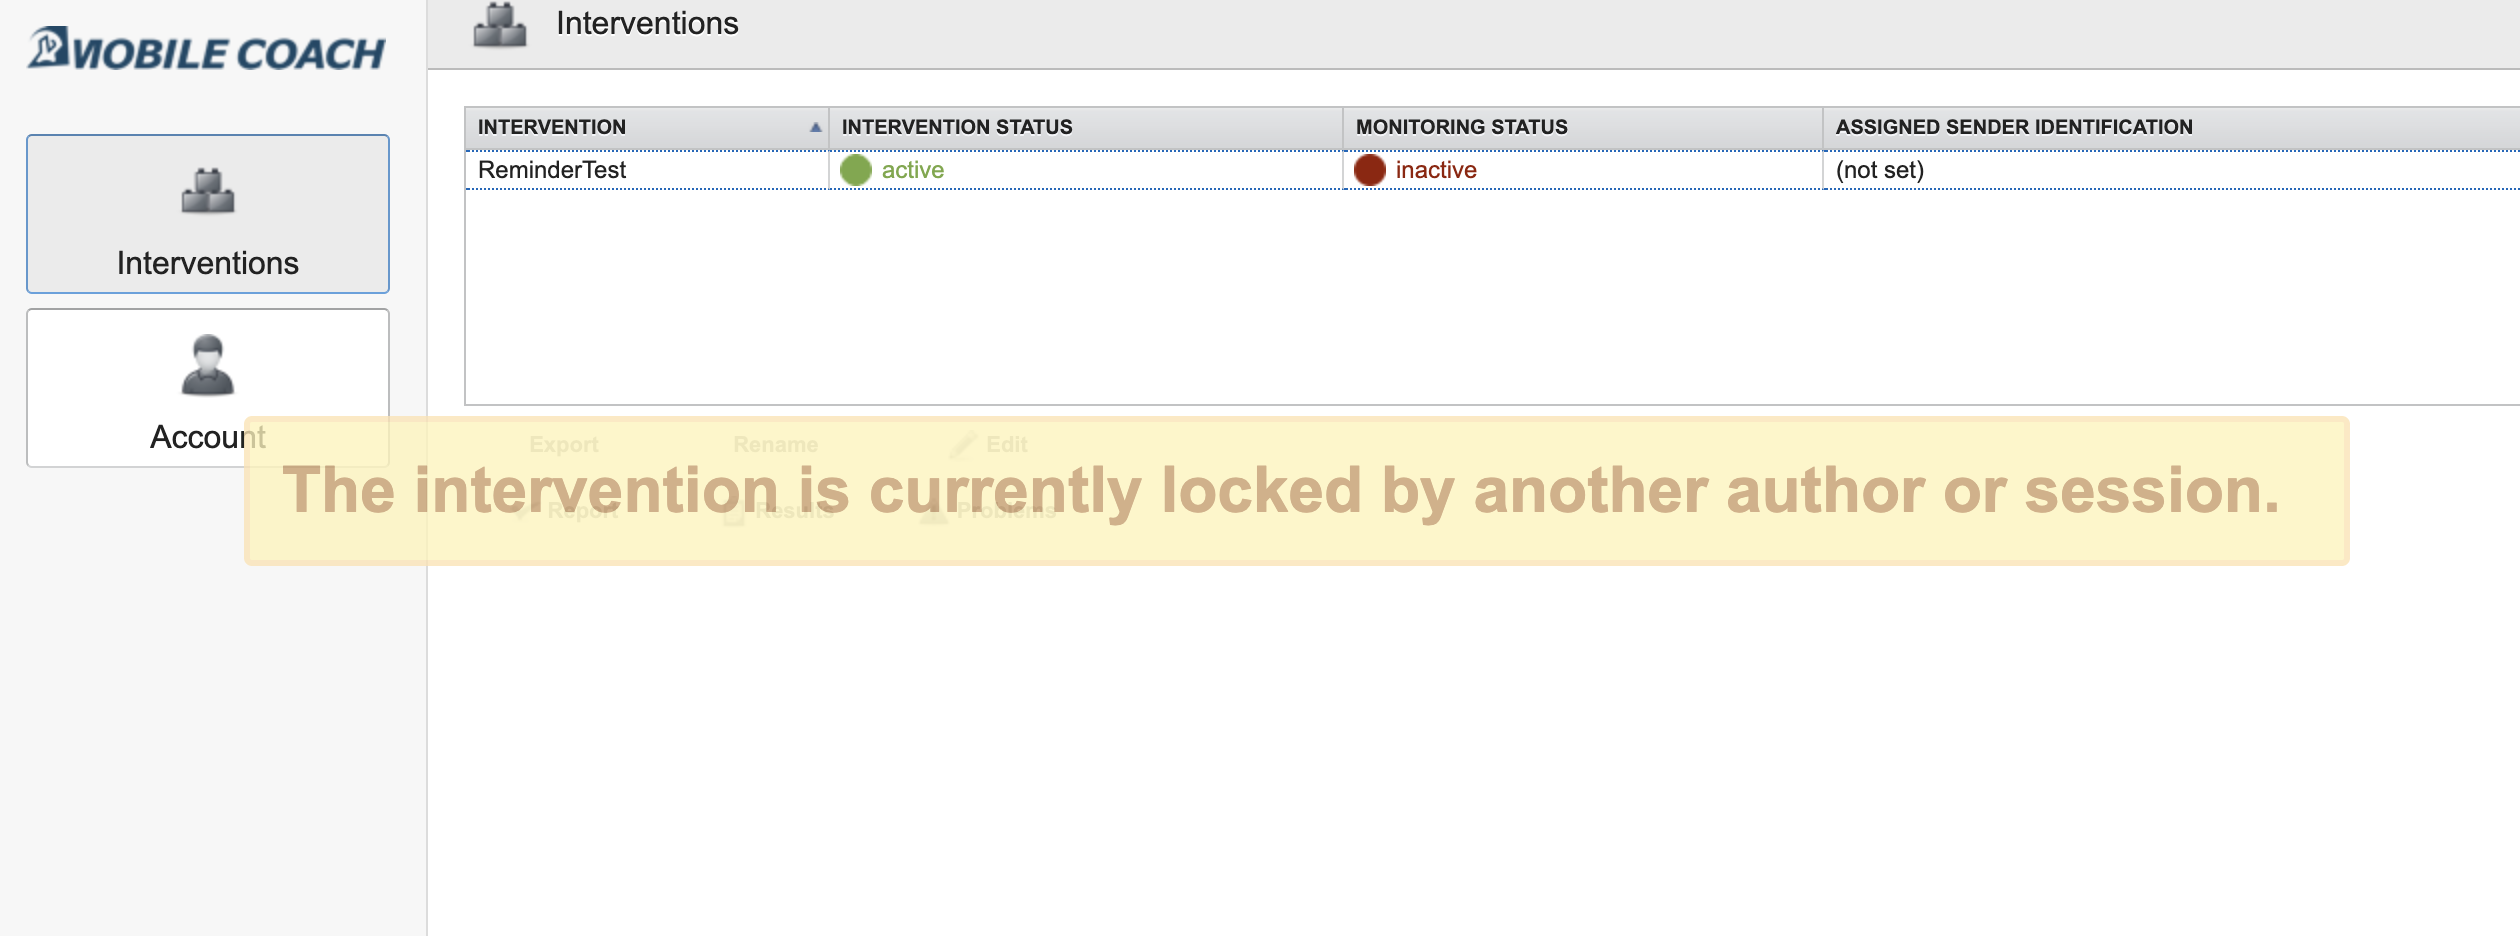
Parallel work is currently not supported, so only one person can work on an intervention at a time. So, if you see this alert, another author or admin is in the intervention. If you’re completely sure, that nobody is working on it right now but it is still locked, you can (if you’re admin) reset all locks under the “Account” screen.
Intervention Detail View
If you edit an intervention you will see a lot of new options. We'll give an overview about every Intervention Detail View tab here. For more detailed information about the Micro Dialogs, Rules etc. you can find separate docs in the menu on the left.
Intervention and Monitoring states
In the top right of the screen you can see two buttons Activate Intervention and Activate Monitoring. These states are very important for your intervention.
Activate/Deactivate Intervention: If this is active, you can’t edit the 'Basic Settings and Modules' options. This is an additional layer of security. You shouldn't change there something in a running intervention.
Activate/Deactivate Monitoring: If this is active, the intervention is running. The mobile app can connect to the server and exchange messages. Therefore all possible intervention changes are locked. To be able to change e.g. a micro dialog, you have to deactivate the monitoring. During an ongoing intervention, changes should only be made at off peak times. This reduces interruptions for the participants.
Basic Settings and Modules
In this tab you can set up the basic settings of the intervention.
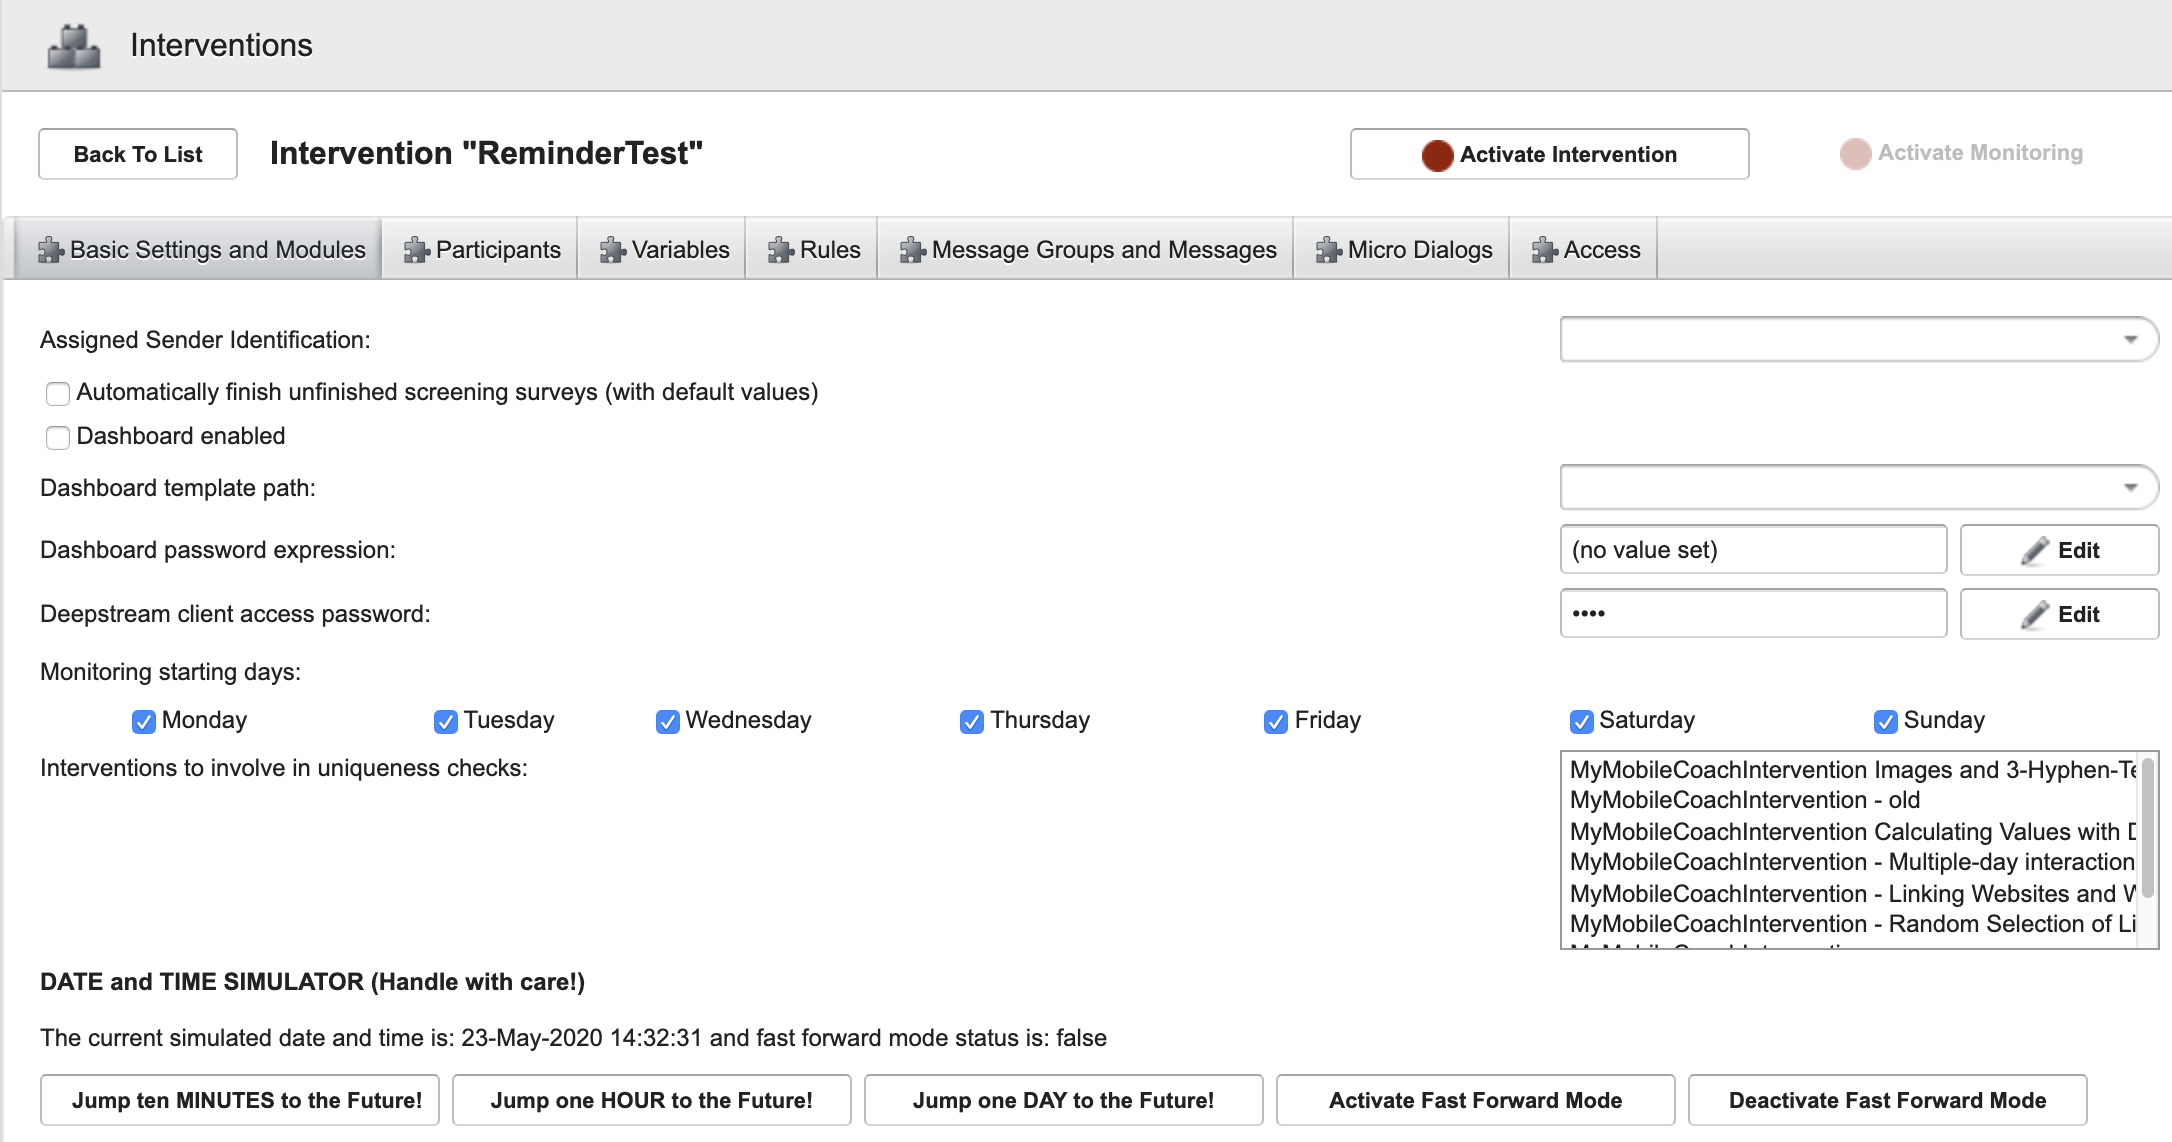
Options
| Option | Explanation |
|---|---|
| Assigned Sender Identification | You can add a phone number here from a SMS provider, that will send all the outgoing SMS in the intervention. |
| Automatically finish unfinished screening surveys (with default values) | CURRENTLY NOT IN USE. |
| Dashboard enabled | CURRENTLY NOT IN USE. Please be aware, this is not the “dashboard/cockpit”. The Cockpit has to be set up additionally. |
| Dashboard template path | CURRENTLY NOT IN USE. |
| Dashboard password expression | CURRENTLY NOT IN USE. |
| Deepstream client access password | You need this password to connect the app with the intervention. The creator of your MobileCoach Mobile App has to add this password in the AppConfig file. |
| Monitoring starting days | All days must be selected for the intervention to run correctly. These options will be revised next time. |
| Interventions to involve uniqueness checks | todo |
Date and Time Simulator
[TODO]
Participants
When the participant opens the app and connects to the server, it immediately creates a new participant. You can see all participants in this list here with some additional participant variables. These variables already exists.
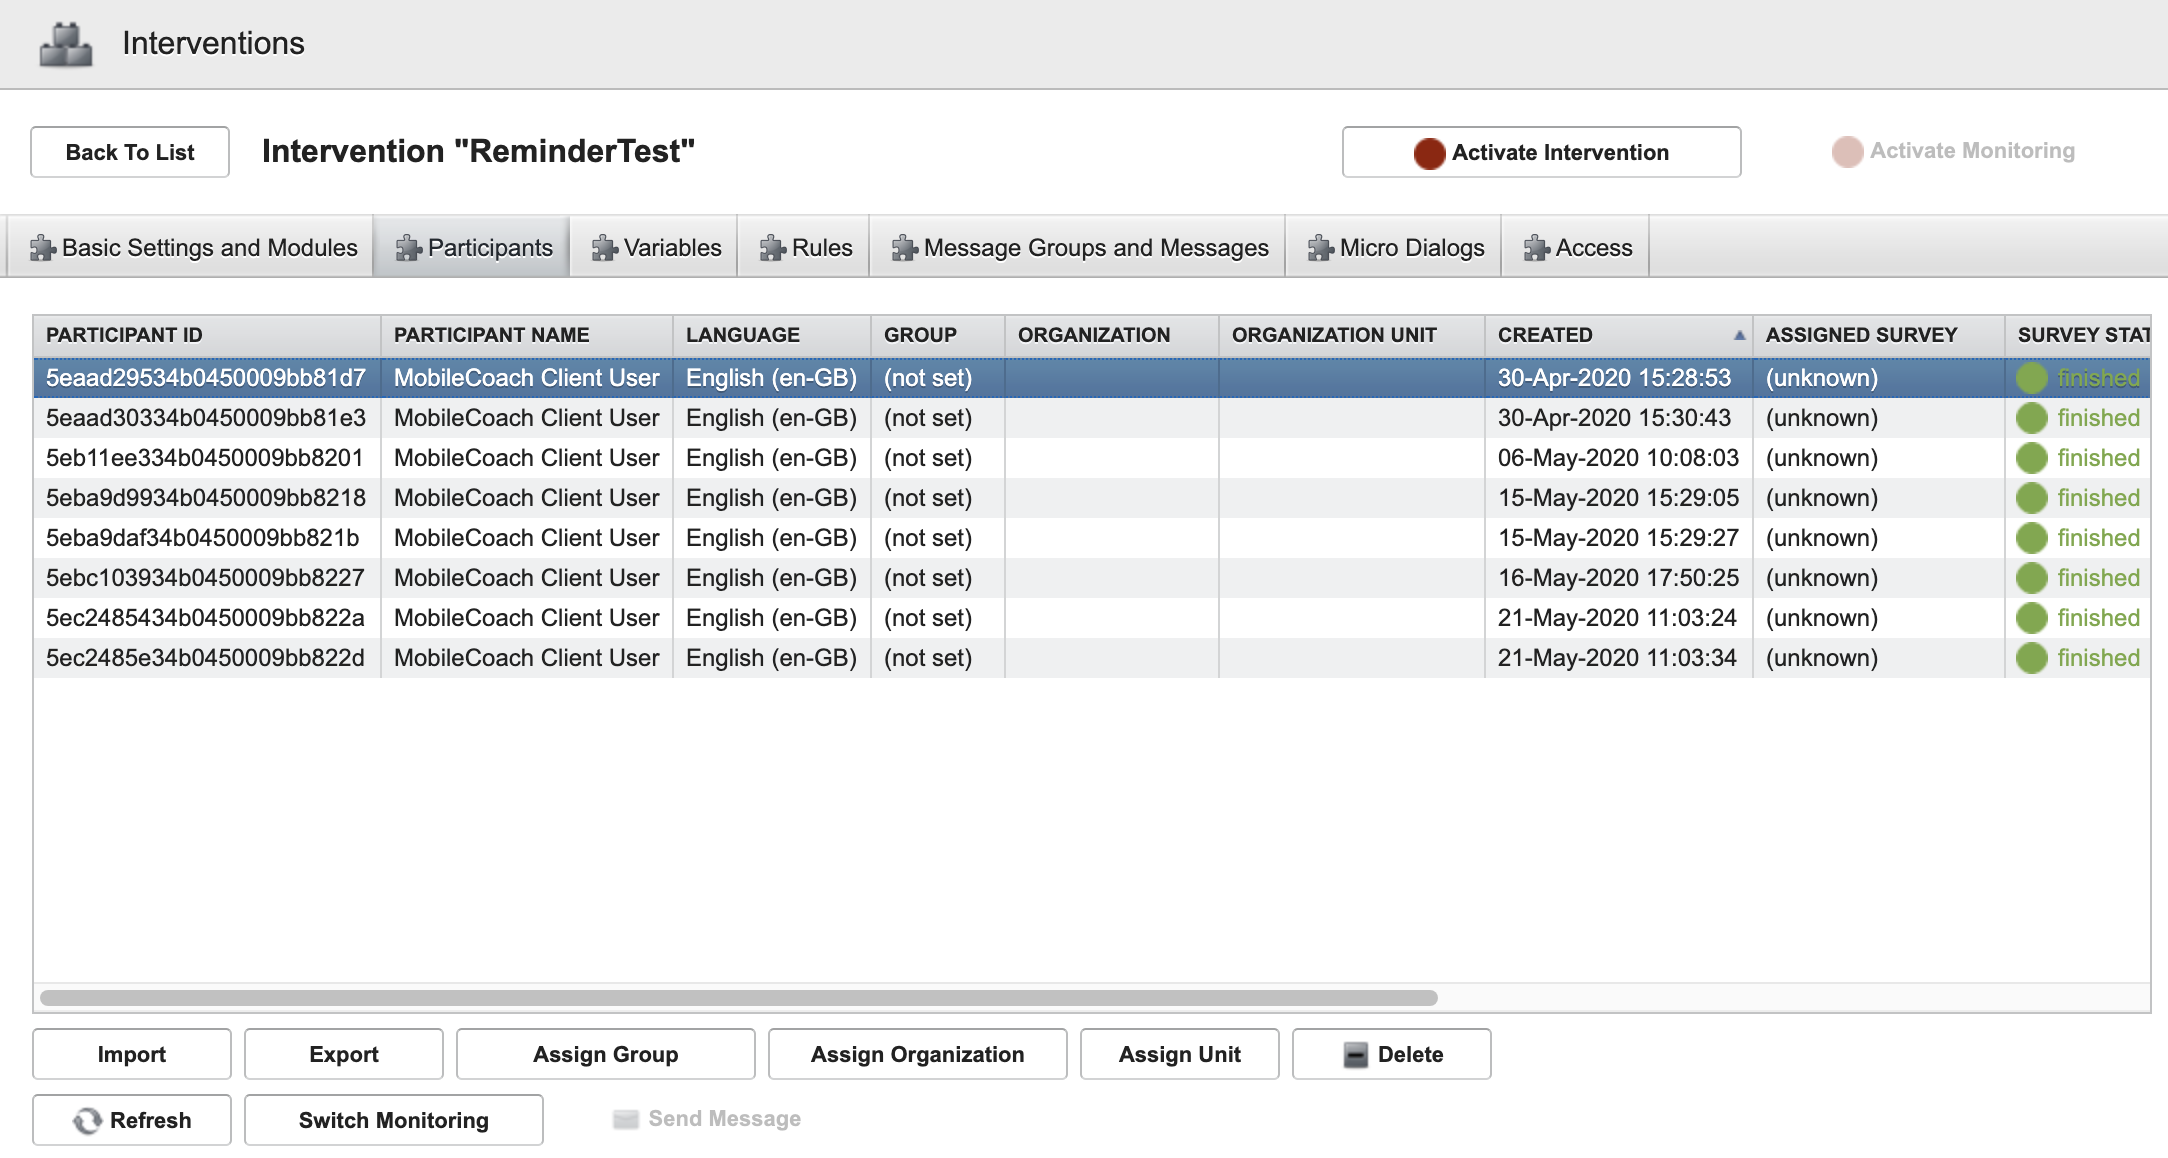
Participant variables
| Name | Variable name | Explanation |
|---|---|---|
| Participant ID | $participantIdentifier | Unique ID of the participant |
| Participant Name | $participantName | Name of the participant. Default is “MobileCoach Client User”. Is mostly overwritten with the name/nickname of the participant. |
| Language | $participantLanguage | Selected language of the user. Be aware that you can define one or different languages that can be used in the app AND in the server. |
| Group | $participantGroup | Assigned group of the participant. |
| Organization | $participantOrganization | Assigned organization of the participant. |
| Organization Unit | $participantOrganizationUnit | Assigned organization unit of the participant |
| Created | - | Participant creation date: Date and time the user opened the app the first time. |
| Assigned Survey | - | CURRENTLY NOT IN USE |
| Survey Status | - | CURRENTLY NOT IN USE |
| Data for monitoring available | - | CURRENTLY NOT IN USE |
| Intervention status | $interventionStatus | Shows if the participant finished the intervention. The default is 'false'. In the end of the intervention you can set this state to 'true'. |
| Monitoring status | - | CURRENTLY NOT IN USE |
Action buttons
| Buttons | Explanation |
|---|---|
| Import | Import of participants (needs a .mc file) |
| Export | Export of participants (generates a .mc file) |
| Assign Group | Assign a group to a participant. |
| Assign Organization | Assign an organization to a participant. |
| Assign Unit | Assign an organization unit to a participant. |
| Delete | Delete a participant. |
| Refresh | Refreshes the participant list. |
| Switch Monitoring | CURRENTLY NOT IN USE |
| Send Message | Here you can send a direct message or a message of a message group (SMS or Email) to the participant. Mostly used for test/debugging purposes. |
Variables
Here you can define all needed variables, their default value and the privacy/access settings for the intervention.
caution
Please be aware that all variables needs a dollar sign at the start.
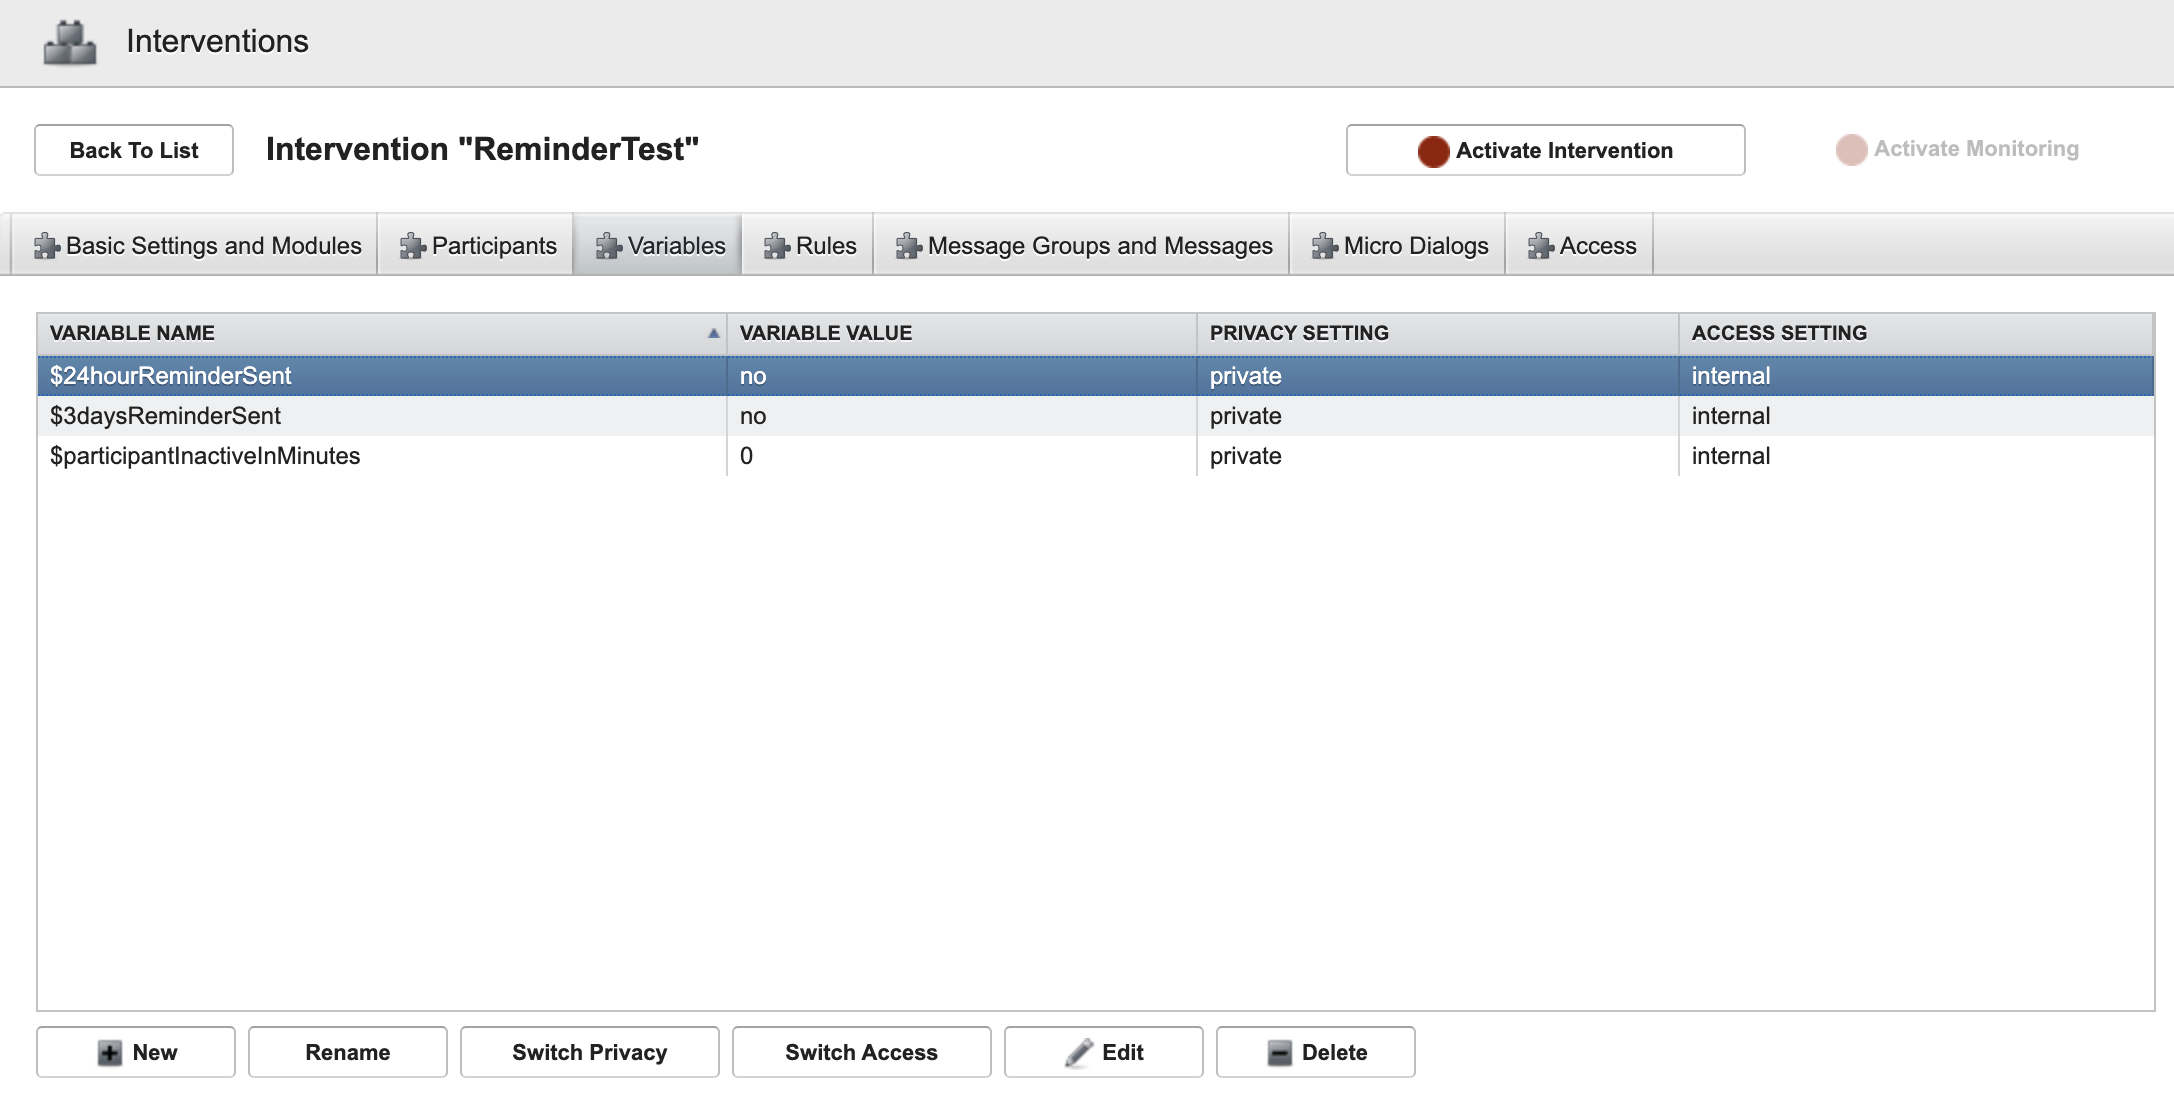
Variable name: Name of the variable. Please be as precise as possible with the naming. Do not forget to add a '$' sign a the variable start.
Variable value: Default value of the variable
Privacy Setting: private is the default setting. shared with group and shared with intervention is currently not in use. shared with intervention and dashboard is required if you can access the variable in the cockpit.
Access Setting: internal is the default. manageable by service means, that the app itself can directly change this variable (like reading out steps from google fit and set it directly). externally readable and externally read and writable allow that external services can (if they have permission) fetch or edit that variable. This is currently not in use.
Action Buttons
| Buttons | Explanation |
|---|---|
| New | Create a new variable |
| Rename | Rename an existing variable |
| Switch Privacy | Change Privacy Settings (can just have one value) |
| Switch Access | Change Access Settings (can just have one value) |
| Edit | Edit/Change a variable |
| Delete | Delete a variable |
(Main) Rules
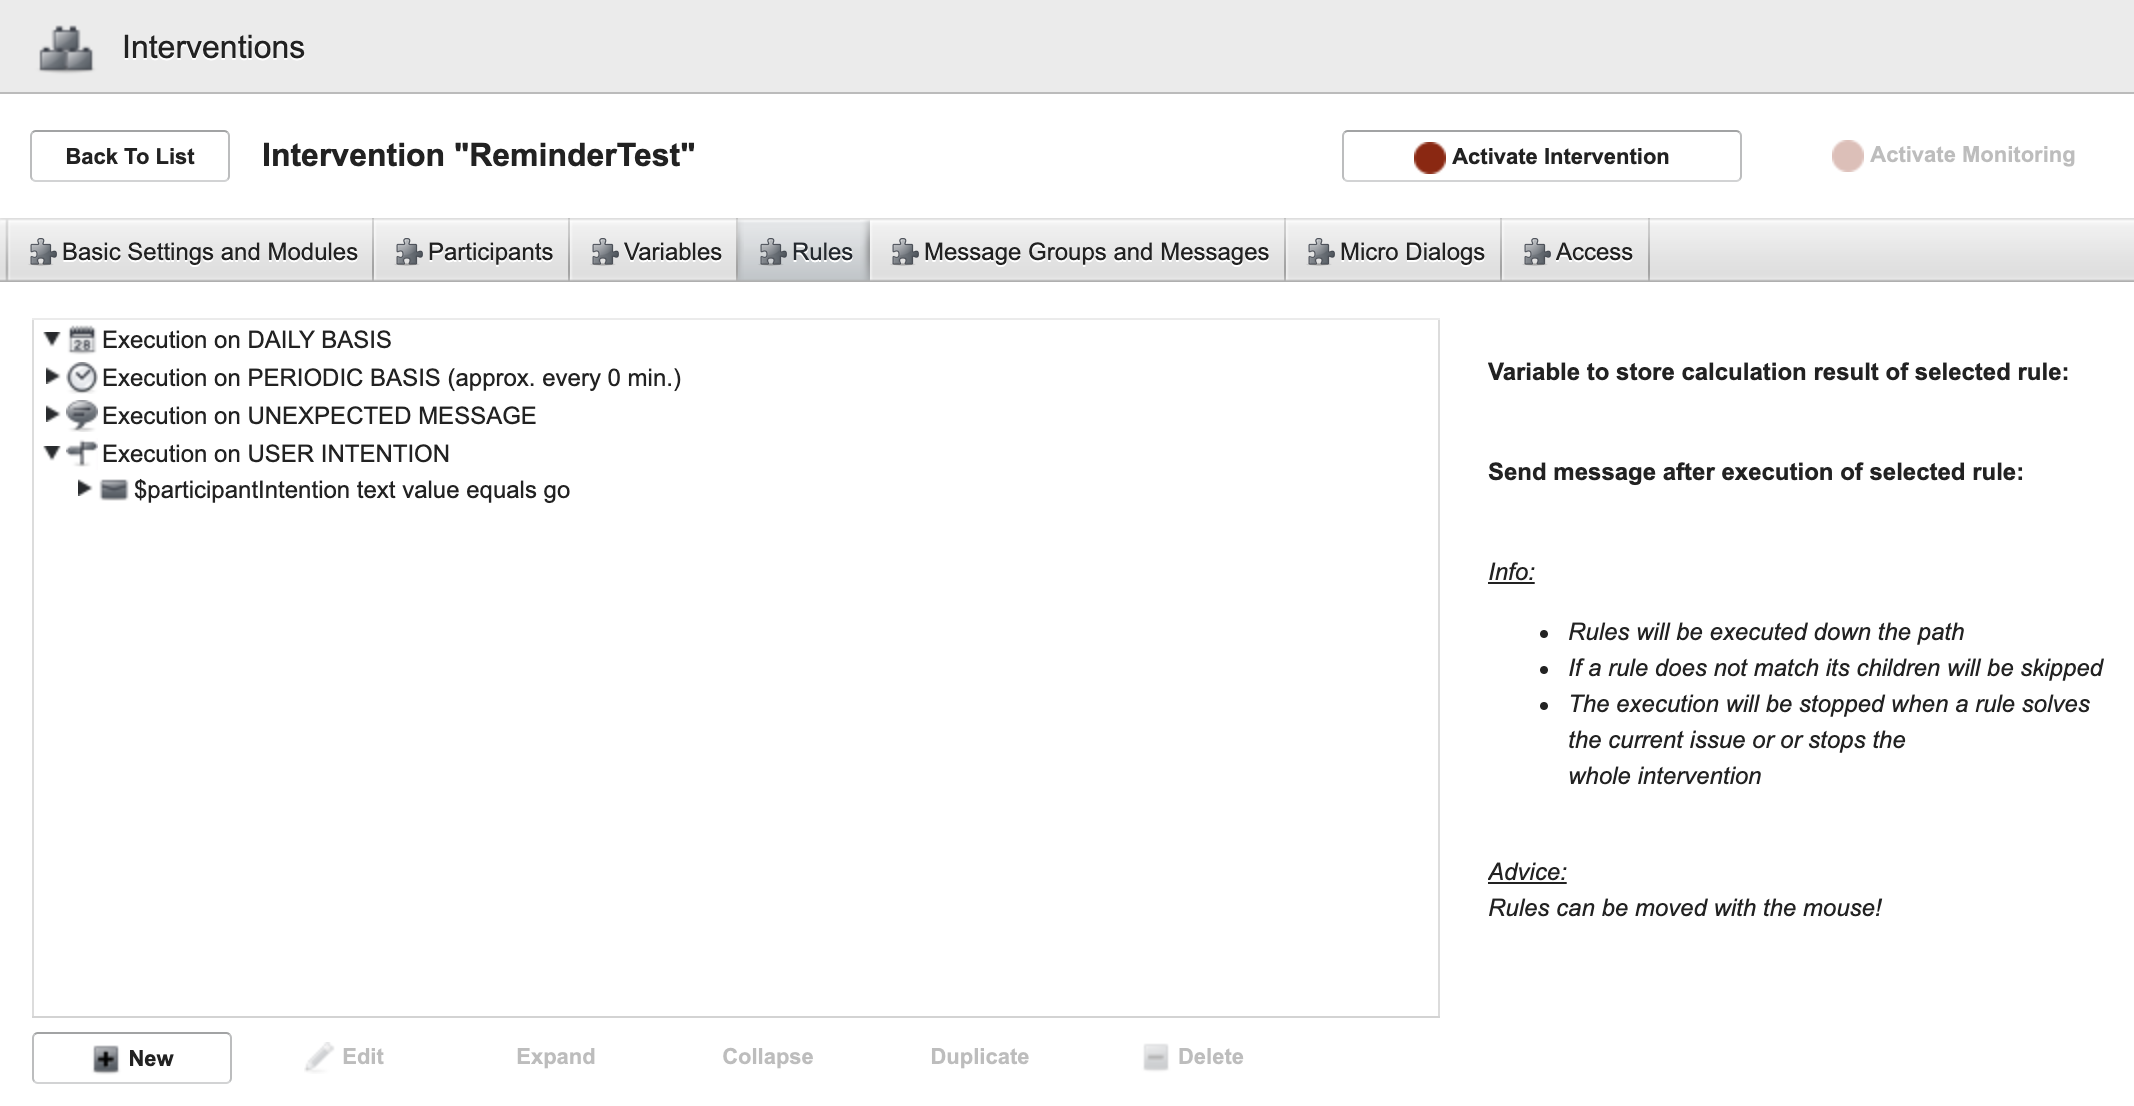
These are the main rules for all participants / the whole intervention. This is just a short overview about these main rules. The main rule tree is explained in more detail in a separate doc.
DAILY BASIS
"Daily basis" rules are always executed at around midnight (server time). An example of such a rule could be to increment a variable that indicates how many days the participant has been in the study or the handling of the current study stage.
PERIODIC BASIS
“Periodic basis” rules are executed approximately every five minutes. So here are rules that are needed for quick actions. An example is an escalation-mechanism (could also be solved with daily basis, depends on the urgency).
UNEXPECTED MESSAGE
CURRENTLY NOT IN USE!
USER INTENTION
User intentions are sent from the mobile app. These intents can be catched and reacted to here. For instance which language the participant chose.
Message Groups and Messages
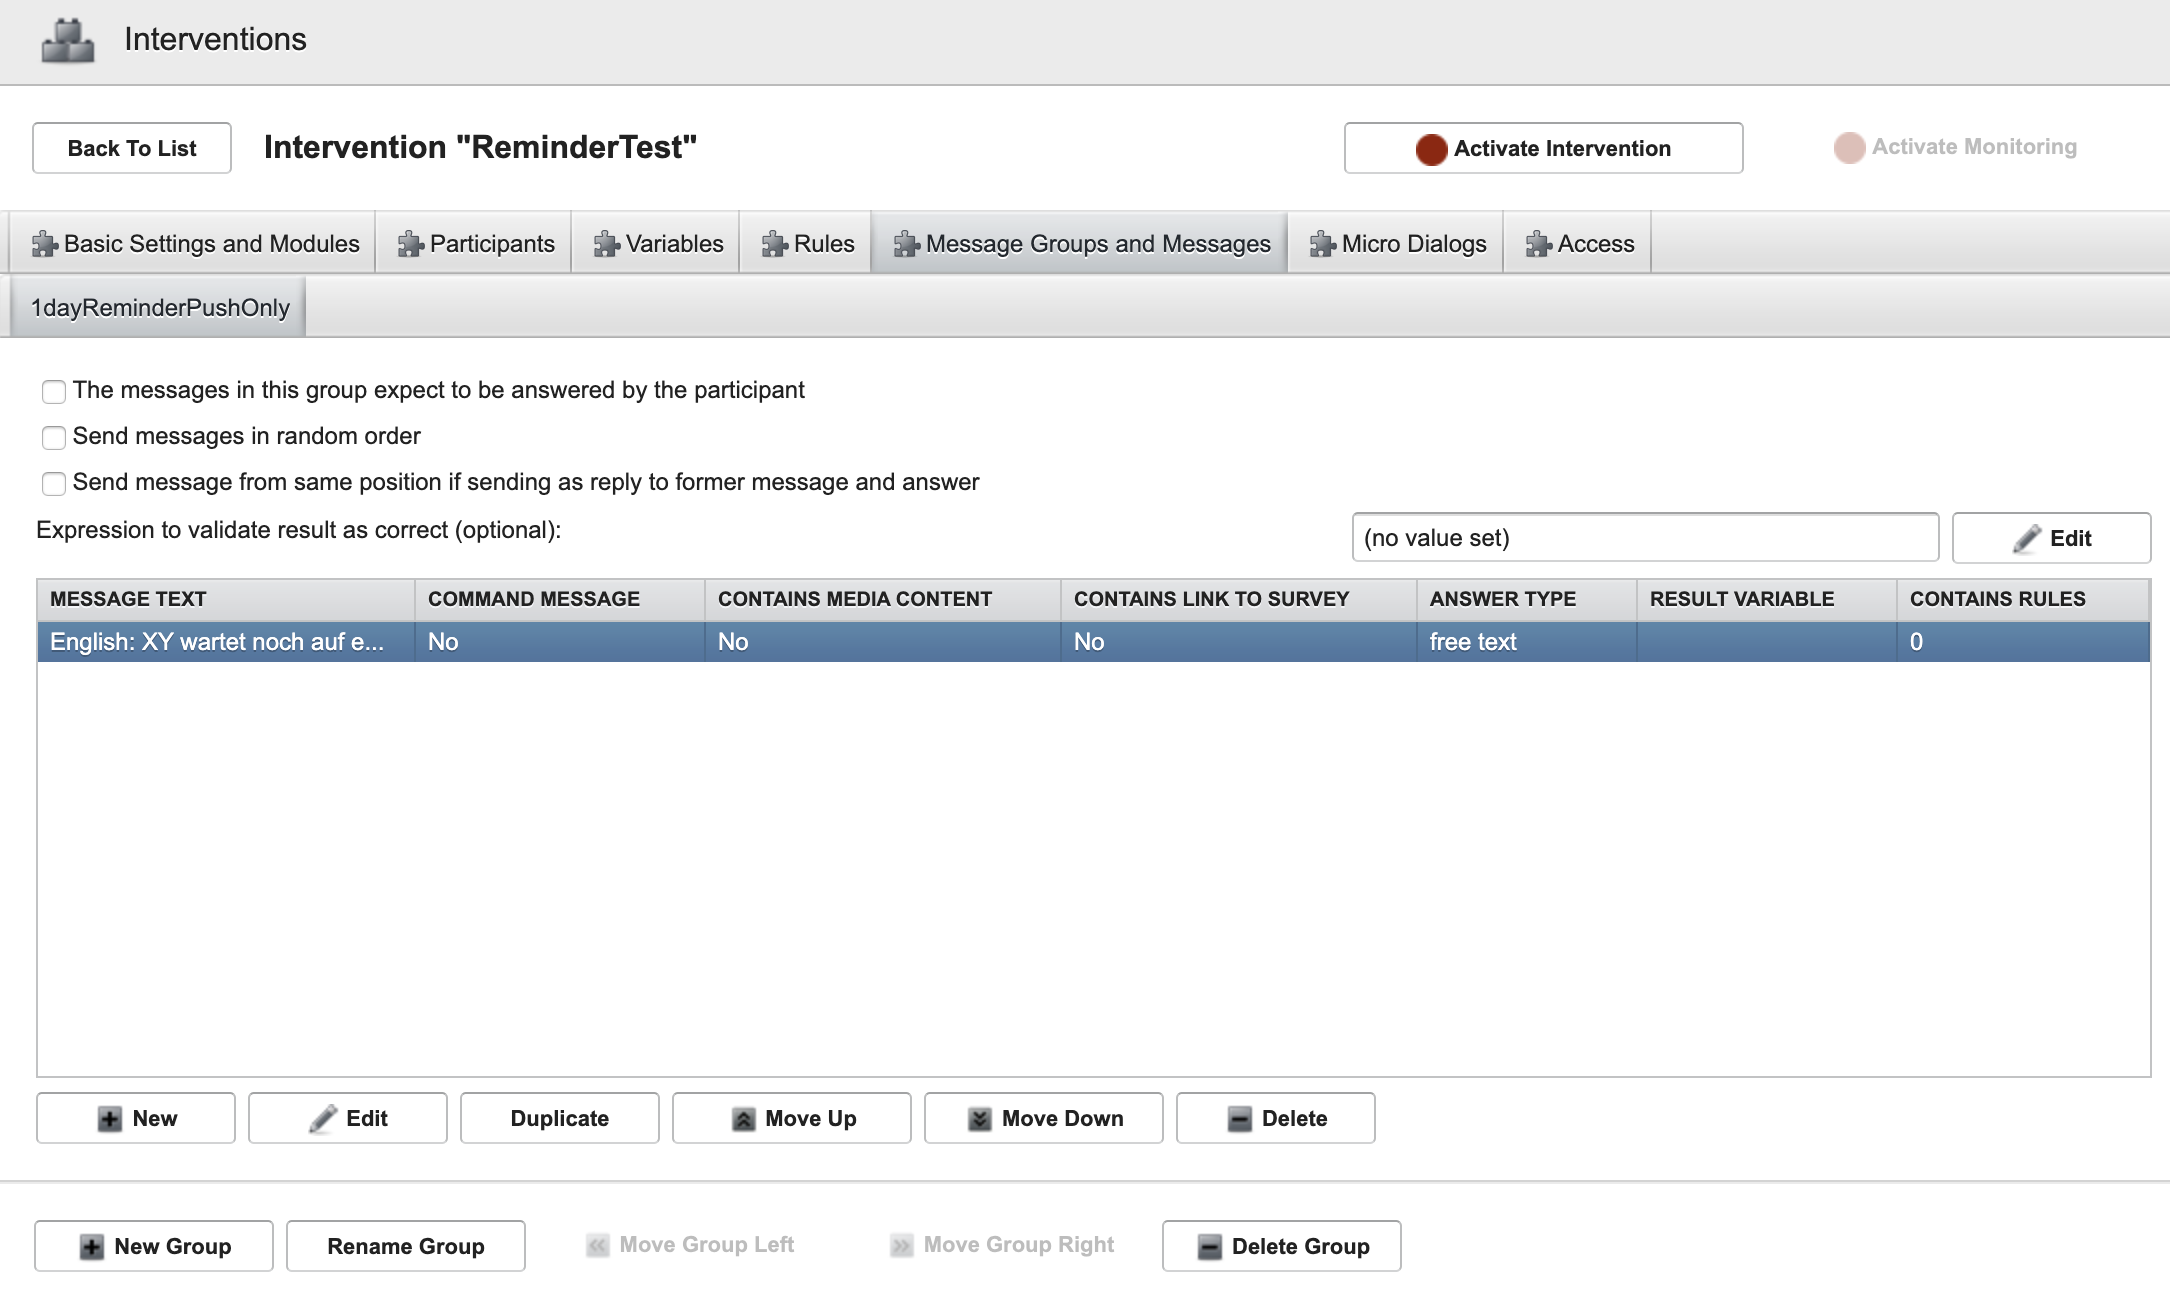
In this section you can set up message groups, in which you can send additional Push-Notifications, SMS or Emails to the participant, health professional etc. There will be tutorials for the three contact mechanisms that are linked here. [TODO]
Micro Dialogs
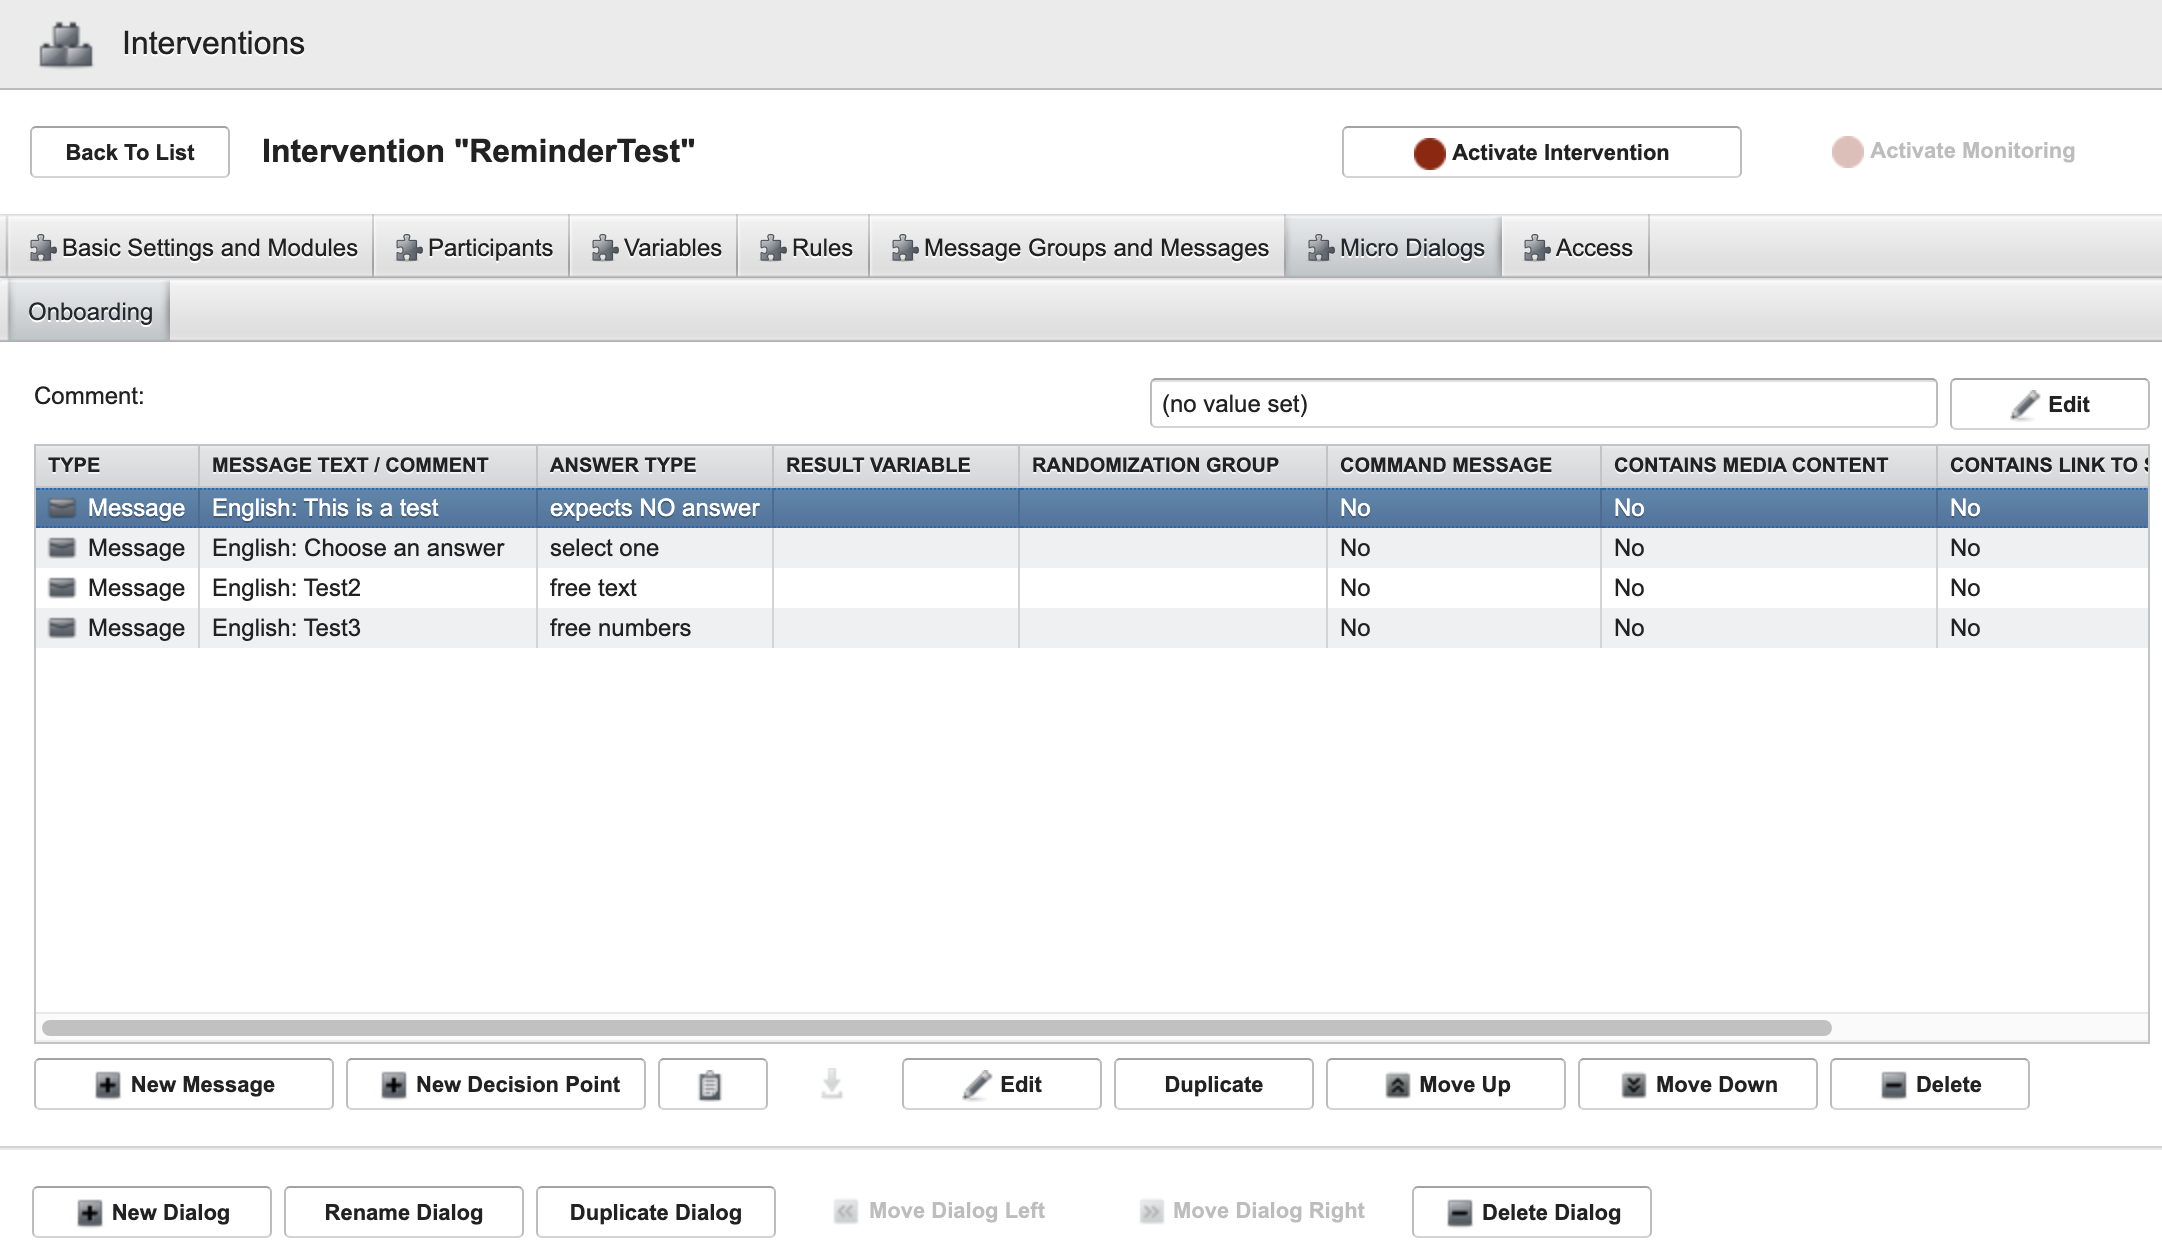
Here you can handle the Micro Dialogs, these are blocks of messages and decision points. Micro Dialogs can have conversational turns but also calculate variables, jump to different micro dialogs etc. This section is quite complex and is explained in detail here: Micro Dialogs.
Action buttons (Micro Dialog)
| Buttons | Explanation |
|---|---|
| New Dialog | Create a new Micro Dialog |
| Rename Dialog | Rename an existing Micro Dialog |
| Duplicate Dialog | Duplicate an existing Micro Dialog |
| Move Dialog Left | Move a Micro Dialog to the left |
| Move Dialog Right | Move a Micro Dialog to the right |
| Delete Dialog | Delete a Micro Dialog |
Action buttons (Messages)
| Buttons | Explanation |
|---|---|
| New Message | Create a new message within the Micro Dialog |
| New Decision Point | Create a new Decision Point within the Micro Dialog |
| Edit | Edit/Change a message |
| Duplicate | Duplicate a message |
| Move Up | Move the message one up. (The messages/decision point are executed from top to bottom.) |
| Move Down | Move the message one down. |
| Delete | Delete a message |
Access
This section is only visible by the admin. Here you can add authors to the intervention, to enable them to work on it. More about the Access Control you can find here: Access Control
